Introduction
Winterizing a boat is an essential maintenance task to help prolong the life of your boat and ensure it stays in optimal condition during the cold winter months.
Winterizing involves draining water from systems, changing fluids, protecting the engine, and properly storing the boat.
Neglecting to winterize can lead to catastrophic engine damage from freezing water, corrosion, build up of gunk in the fuel system, and other problems.
Table of Contents
- Introduction
- Why Winterize a Boat?
- Types of Antifreeze
- Tools and Supplies Needed
- Step-by-Step Guide to Boat Winterization For All Boat Types
- Winterizing Outboard Engines
- Winterizing Inboard Engines
- How to Winterize an Outboard Lower Unit
- Additional Winterization Tips
- Winter Storage Location Comparison
- Common Mistakes to Avoid
- Mid-season maintenance for Year-Round Boaters
- Environmental Considerations
- Conclusion
- FAQ
Why Winterize a Boat?
There are several crucial reasons every boat owner should make winterization a priority:
- Prevent freezing damage – Water expands as it freezes. Any water left in the engine, plumbing, or other systems can expand and crack components, leading to extremely costly repairs.
- Avoid corrosion – Prolonged exposure to moisture causes corrosion on metal parts. Flushing systems, adding stabilizers, and applying fogging oil prevents this.
- Save money – The repairs needed after a season of neglect can run into the thousands. A little time winterizing saves big down the road.
- Ensure easy starting – Stabilizing fuel prevents build up of gunk that makes spring starting difficult. Lubricating parts keeps things running smoothly.
- Maintain performance – Systems coated in varnish and corrosion run inefficiently. Winterizing keeps things clean.
- It’s required – Most manufacturer warranties require proper winterization and storage.
In short, a well winterized boat equals a worry-free off-season and quick return to the water when warmer weather allows.
Other Topics to Consider: How to keep mice out of a boat during winter storage.
Types of Antifreeze
When winterizing plumbing and other onboard systems, you’ll need to use an antifreeze designed for marine use. Two main options exist:
Ethylene Glycol
- Pros: Readily available and inexpensive
- Cons: Toxic to wildlife if leaked or spilled
Propylene Glycol
- Pros: Non-toxic and environmentally friendly
- Cons: More expensive and harder to find
Most experts recommend spending the extra money on propylene glycol antifreeze since it poses no environmental risks with accidental discharge. Only use ethylene glycol if your owner’s manual specifically calls for it.
Tools and Supplies Needed
Gathering the right tools and supplies makes winterization much smoother:
- Antifreeze (propylene glycol)
- Fogging oil
- New engine oil and oil filters
- Fuel stabilizer
- Oil suction pump
- Lubricants for greasing parts
- Rags, buckets, funnels
- Garden hose, water muffs, etc. for flushing
- Storage cover or shrink wrap
Check your owner’s manual – certain engines require specialized winterization procedures or supplies. Having everything you need on hand allows you to complete winterization in one session.
Step-by-Step Guide to Boat Winterization For All Boat Types
With the right gear in hand, let’s walk through the winterization process step-by-step:
These steps should be performed on any boat you are winterizing:
- Drain water systems – Drain water from livewells, sinks, showers, ballast tanks and any system that holds water.
- Remove drain plugs – Remove drain plugs from the boat and engine to ensure all water drains fully.
- Clean and dry – Flush systems with clean water, allow to fully dry, and spray with a corrosion inhibitor and moisture displacer.
- Stabilize fuel – Add fuel stabilizer to the gas tank and run the engine to circulate the additive through the fuel system.
Winterizing Outboard Engines
For outboards, be sure to:
- Change oil and filter
- Flush engine with fresh water
- Apply fogging oil spray to cylinders
- Grease steering linkages and pivot points
- Disconnect and drain battery
Winterizing Inboard Engines
Inboards involve a few extra steps:
- Change oil and filters
- Flush saltwater cooling systems
- Drain freshwater systems and fill with non-toxic antifreeze
- Coat engine internals using fogging oil
- Grease u-joints, gimbal bearings, and steering components
- Check coolant strength and refill as needed
How to Winterize an Outboard Lower Unit
The lower unit on outboard motors and stern drive engines needs special attention when winterizing:
- Drain old gear lube from the lower unit and refill with new, recommended gear oil. Check for milkiness or water in old oil which indicates seal problems.
- Inspect gaskets and seals for leakage. Have any leaks repaired before storage to prevent off-season contamination.
- Lubricate u-joints, gimbal bearings, and other moving parts with marine grease. Consult your owner’s manual for specific points.
- For stern drives, coat exhaust passages in the lower unit with fogging oil to prevent corrosion.
- Check lower unit for fishing line tangled around the propeller shaft. Remove any debris before storage.
Be sure to consult your owner’s manual – the above covers general steps, but specific engines have unique requirements.
Additional Winterization Tips
Beyond the core engine and system steps, a few other tips will ensure your boat stays in top shape:
Covering the Boat
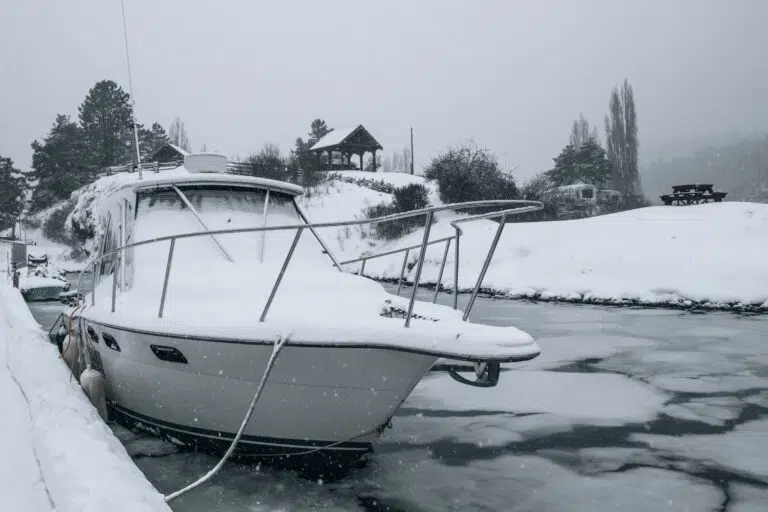
Cover your boat with a canvas winter cover or shrink wrapping. This protects from snow, ice, and rain. Use padding and boards under cover if needed to prevent abrasion. Check on the boat throughout winter to ensure the cover remains secure.
Removing Valuables
Electronics, tackle, and other valuables should be removed and stored in climate controlled locations. Outboard motors can be detached and stored indoors as well.
Maintain Insurance
Canceling boat insurance for the winter seems logical, but still makes you vulnerable to damage from storms, falling tree limbs, vandalism and theft. Keep basic coverage active to be safe.
Winter Storage Location Comparison
| Location | Pros | Cons |
|---|---|---|
| Outdoors | Low cost | Exposure to elements, need good cover |
| Unheated warehouse | Affordable, protected | Condensation issues, batteries may still need removal |
| Heated warehouse | Optimal conditions | More expensive |
| DIY in backyard | Convenient | Need space, outdoor cover |
Common Mistakes to Avoid
While winterizing your boat, keep these pitfalls in mind:
- Not reinstalling drained hoses or closing seacocks – This allows water to enter during rain or snowmelt
- Using automotive antifreeze – Only marine types like propylene glycol are suitable
- Forgetting to stabilize the fuel – Gasoline left untreated over months goes bad
- Skipping greasing and lubrication – Lack of lubrication leads to seized parts in spring
- Leaving batteries connected – Cold weather drains batteries; store them warm and dry
Mid-season maintenance for Year-Round Boaters
If you’re one of the lucky few who get to enjoy boating all year round, winterization might not be a complete shutdown for you. However, that doesn’t mean you should ignore maintenance during the colder months. Here are some tips for mid-season maintenance:
- Regular Engine Checks: Even if you’re using your boat, the engine can suffer from the cold. Make sure to check the oil levels and the condition of the engine before each outing.
- Antifreeze Levels: Keep an eye on antifreeze levels, especially if you’re boating in extremely cold conditions. A 50/50 mix of antifreeze and water is generally recommended for optimal freeze protection.
- Battery Care: Cold weather can be harsh on batteries. Make sure they are fully charged and well-insulated against the cold.
- Seal Inspections: Cold weather can make seals and gaskets brittle. Regularly inspect these components and replace them as needed to prevent leaks.
- Fuel Stabilization: Even if you’re using your boat, fuel can still degrade over time. A fuel stabilizer can help maintain fuel quality.
Environmental Considerations
Winterizing your boat isn’t just about protecting your investment; it’s also about being responsible stewards of the environment. Here are some ways to make winterization eco-friendly:
- Use Propylene Glycol Antifreeze: As mentioned earlier, propylene glycol is non-toxic and safer for marine life compared to ethylene glycol. Always opt for this when possible.
- Proper Disposal of Fluids: Used oil, old antifreeze, and other fluids should be properly disposed of at designated recycling centers. Never dump these into water bodies or down drains.
- Eco-Friendly Cleaning Products: Use biodegradable cleaning products for washing your boat. This minimizes the environmental impact when you flush the systems.
- Battery Care: If you’re replacing batteries, make sure to recycle the old ones properly. Many service centers offer battery recycling services.
- Energy-Efficient Storage: If you’re storing your boat in a facility, consider one that uses renewable energy or energy-efficient systems to minimize your carbon footprint.
Conclusion
While it takes some time and elbow grease, winterizing your boat properly each year saves money and hassle down the road. Your vessel will reward you when it’s ready to go for the next boating season!
Using this guide and your owner’s manual, you can winterize your boat with confidence. Just be sure to get out on the water and enjoy the last days of fall before stowing your boat away for the season!
FAQ
What type of fogging oil should I use?
Use a marine-grade fogging oil designed for your type of engine. Some specialty fogging oils are made for 4-stroke or fuel-injected engines. Check your manual.
Can I skip the oil change when winterizing?
No, old oil can contain moisture and acids that lead to corrosion over the winter. Always change lower unit and engine oils before winter storage.

