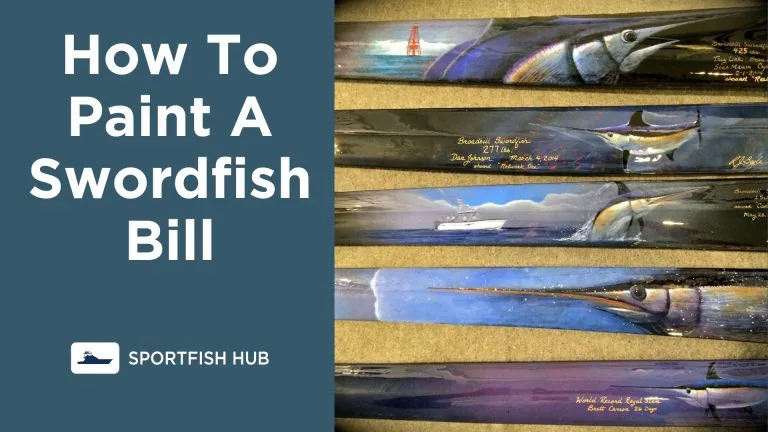
Catching a massive swordfish is an angler’s dream. Preserving the swordfish bill as a trophy to commemorate the catch is a great way to proudly display your fishing accomplishments.
Learning how to properly prepare and paint a swordfish bill takes time and patience, but the end result is a stunning marine work of art.
Table of Contents
Cleaning and Preparing the Swordfish Bill
Thoroughly cleaning and preparing the swordfish bill is crucial before painting it. Here are the key steps:
- Remove tissue and debris – Carefully wash the bill with mild soap and water, using a soft bristle brush to remove any leftover bloody tissue or debris. This eliminates odors and fully exposes the bony surface.
- Whiten the surface – Soak the bill in a 50/50 hydrogen peroxide and water solution for 1-3 days. This helps whiten the bill and draw out any remaining oils.
| Cleaning Method | Timeframe |
|---|---|
| Soak in hydrogen peroxide solution | 1-3 days |
| Rinse with clean water | 10-15 minutes |
| Air dry completely | 1-2 weeks |
- Dry completely – Allow the bill to fully air dry, laying flat, for 1-2 weeks. Rotating occasionally prevents warping. The surface must be completely dry before painting.
- Preserve with borax – Burying in or soaking the bill with borax can help preserve it long-term by absorbing moisture.
- Clean with ammonia – Soaking in clear ammonia solution leaches out any lingering grease or residue. Use in a well-ventilated area.
Thorough cleaning and whitening prepares the bill for applying artwork by removing tissue, odor, and oils. Fully drying and using borax prevents future warping.
Sketching and Mapping Out the Swordfish Bill Painting
Once prepped, lightly sketch out the artwork design in pencil directly on the bill. Here are sketching tips:
- Consider a maritime theme with waves, ships, etc. that connects to fishing.
- Sketch the catch details like boat name, angler, date, location, and swordfish size.
- Get creative with unique artwork like sea creatures, nautical symbols, or ocean scenes.
- Use a ruler to evenly space out elements and light lines easily covered by paint.
- Make the artwork proportional to the length and width of the bill’s shape.
| Sketching Supplies |
|---|
| Pencil |
| Ruler |
| Eraser |
Take time laying out the initial design since it will guide the coloring and detail work.
Applying the Base Colors on the Swordfish Bill
After sketching, use paint to apply the base background colors. Work smoothly and slowly to avoid heavy brush strokes.
- Use acrylic or oil paints for ease of use, durability, and color vibrancy.
- Paint backgrounds first so main subjects and details stand out.
- Apply multiple coats to achieve full saturation and coverage.
- Let layers fully dry between new coats to prevent smearing or damage.
- Cover the entire surface to protect the bone material underneath.
| Base Painting Tips |
|---|
| Use high-quality artist paints |
| Work in a well-ventilated area |
| Let paint fully dry between coats |
Painting the base colors provides the foundation for the detail work and shading that comes next.
Detailing and Shading the Painted Swordfish Bill
Once the base colors have fully dried, the detail work can begin. Use small brushes for intricate elements.
- Outline major elements like figures, boats, fish, etc. with thin dark lines.
- Shade shadows and give depth to subjects by layering darker versions of base colors.
- Add lighter highlights on raised edges and areas that would shine.
- Incorporate fine details like scales on fish, windows on ships, etc.
- Use a dry brush technique to produce subtle textured effects.
Detailing is what makes a swordfish bill painting truly come to life on the surface. Take time with it.
Applying Protective Top Coats to the Painted Bill
After all the painting is done, seal the artwork under protective clear top coats.
- Apply 2-3 coats of acrylic sealer for a polished look.
- Use epoxy resin for a thick glossy coating.
- Polyurethane forms a durable yet flexible covering.
- Spray paints yield the most even coverage.
- Let coats fully cure for 24-48 hours between applications.
| Protective Top Coats |
|---|
| Acrylic sealer |
| Epoxy resin |
| Polyurethane |
| Clear spray paint |
Mounting and Displaying the Finished Painted Swordfish Bill
Now it’s time to proudly mount and showcase your artistic swordfish bill.
- Affix to a custom wood plaque with the catch details engraved.
- Display on a wall, desk, or shelf with built-in hangers or stands.
- Mount the bill over a nautical map or ocean artwork for added flair.
- Keep away from direct sunlight to prevent UV damage over time.
- Consider adding lights or glass over the bill for a professional exhibit look.
With the right preparation and artistic effort, your painted swordfish bill will amaze onlookers for years to come. Follow this guide for success.